When Tadej Pogačar stormed to victory at Liège-Bastogne-Liège in 2024, eagle-eyed bike geeks noticed something unusual about his Colnago V4Rs. Beyond his explosive power and tactical brilliance, the Slovenian superstar was riding with a 165mm crank arm paired with an enormous 55-tooth chainring—a combination that would have seemed radical just a few years ago. This wasn't a one-off experiment either. According to Italian cycling magazine Bicisport, Pogačar had already progressively shortened his cranks from 172.5mm to 170mm in 2023, before making the jump to 165mm for Strade Bianche, where he launched a devastating 80km solo attack. His latest marginal gain came in the form of custom Carbon-Ti chainrings, with UAE Team Emirates ordering the 55x40 setup for all their riders.
Big Ring Meets Short Crank
This "big ring, short crank" philosophy represents a fundamental shift in how professional cyclists think about drivetrain optimization. It's not just about having bigger gears for fast descents—as Carbon-Ti's product manager Marco Monticone explained, Pogačar requested the 55-tooth ring specifically to compete with rivals running ten-tooth cassettes. It's about rethinking the entire relationship between human physiology, mechanical efficiency, and aerodynamic positioning. The beauty of this revolution is that everyday cyclists can apply many of these same principles without buying an entirely new bike. By understanding the math and biomechanics behind this trend, you can unlock "free speed" through strategic component swaps and positioning adjustments that improve efficiency without sacrificing comfort or climbing ability.
The Biomechanics of Shorter Cranks
For decades, the cycling industry operated on a simple formula: taller riders get longer cranks. If you were 5'10" to 6'0", you got 172.5mm cranks. Over 6'0"? 175mm was standard. This sizing logic made intuitive sense—longer levers should provide more torque, right? But contemporary biomechanics research and the real-world experimentation of professional cyclists have revealed that this traditional approach may have been getting the physics backward in important ways.
The primary biomechanical advantage of shorter cranks (typically 150-165mm versus the traditional 170-175mm range) involves hip angle at the top of the pedal stroke. When you pedal, your hip reaches its most closed position when the crank arm points straight up toward twelve o'clock. With a 175mm crank, your knee comes higher relative to your hip at this moment, requiring more hip flexion and potentially compressing your hip flexors and abdominal cavity. Switching to a 165mm crank reduces the vertical travel at the knee by 10mm, which might not sound like much, but it translates to approximately 2-3 degrees less hip flexion at the critical top dead center position. This seemingly small change can have profound effects on comfort and efficiency, particularly for riders with limited hip mobility or those spending extended periods in aggressive aerodynamic positions.
The aerodynamic benefits of shorter cranks follow directly from this improved hip angle. When your hip can close more comfortably, you can lower your torso and shoulders without your thighs contacting your chest at the top of each pedal stroke. This allows you to achieve a lower, more aerodynamic position on the drops or aero extensions. For road cyclists, this might mean being able to comfortably hold an aero tuck for longer periods. For time trialists and triathletes, the difference can be even more significant. Pogačar's switch to 165mm cranks on his time trial bike preceded his road bike conversion, suggesting that the position gains were compelling enough to warrant the change across disciplines.
Cornering clearance represents another practical advantage that matters just as much for amateur cyclists as professionals. Shorter cranks provide more ground clearance when your bike is leaned over in turns. This reduced risk of pedal strike means you can corner with more confidence and carry more speed through technical sections. For gravel cyclists or cyclocross riders, where pedal strikes on rough terrain can cause crashes or damage components, the clearance benefits of shorter cranks are immediately apparent. Many gravel riders report improved technical descending after switching to 165mm or 170mm cranks, not because of some magical power gain, but simply because they can pedal through corners and rough sections that would have required coasting before.
The most persistent myth about shorter cranks concerns power output and leverage. The intuitive assumption goes like this: if you shorten the lever arm, you must sacrifice torque. This physics isn't wrong, but it's incomplete. Your body produces torque through muscle contraction, and the optimal lever length depends on your individual physiology and biomechanics. Research on crank length has consistently shown that within reasonable ranges (roughly 145mm to 180mm), crank length has minimal impact on sustainable power output for most cyclists. Your muscles adapt to the leverage they're given, and what matters more is the biomechanical efficiency of the pedal stroke. Shorter cranks allow a slightly higher natural cadence for many riders, and since power equals torque multiplied by cadence, any minor reduction in torque is often offset by increased pedaling speed.
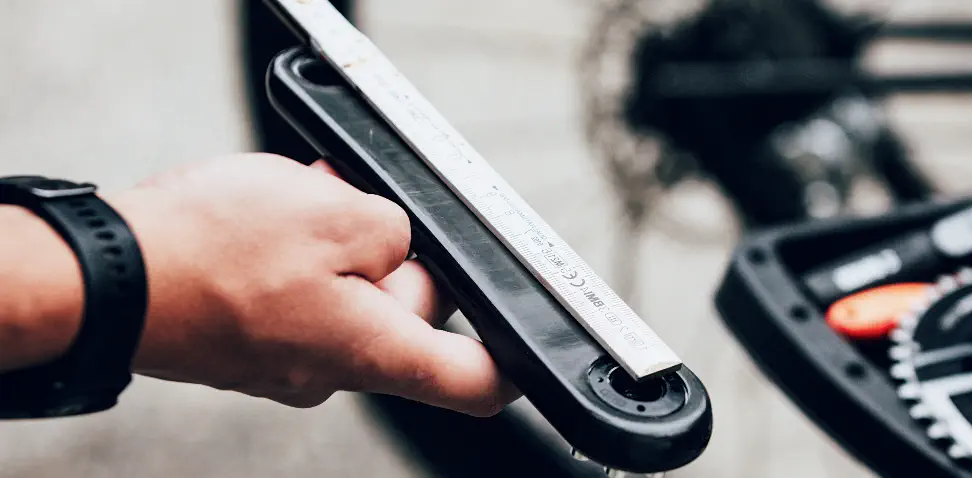
If you're considering shorter cranks, practical sizing guidance is more nuanced than traditional height-based recommendations. A reasonable starting point for most intermediate riders is to subtract 5-10mm from whatever length you're currently running, provided you're on the longer end of the traditional spectrum. If you're 5'9" to 5'11" and have been riding 172.5mm cranks because that's what came on your bike, try 165mm or 170mm. If you're over 6'0" on 175mm, consider 170mm or 165mm. The most accurate approach involves measuring your inseam from crotch to floor while barefoot against a wall. Riders with inseams under 32 inches typically do well with 165mm or shorter, while those between 32 and 35 inches often find their sweet spot in the 165-170mm range. Above 35 inches, 170-172.5mm may remain optimal, but the trend is definitely toward shorter lengths even for tall riders.
Chainring Size and Efficiency Analysis
While shorter cranks primarily address biomechanics and positioning, larger chainrings tackle drivetrain efficiency from a mechanical and aerodynamic perspective. The physics here is straightforward: larger chainrings create straighter chain paths through the drivetrain, which reduces friction and improves efficiency. This efficiency gain might seem marginal in isolation—research suggests improvements of 1-2 watts under ideal conditions—but when combined with other optimization strategies, those small advantages compound across long rides and races.
The chainline physics behind this efficiency gain are worth understanding. Your bike's chain runs in an arc from the chainring to the rear cassette, and the angle at which it approaches each sprocket affects friction. When you're in the big chainring and use the middle of the cassette, the chain runs relatively straight. But shift to the smallest rear cogs, and the chain must bend significantly to reach them. Larger chainrings reduce this bending angle because the chain approaches the cassette from a wider starting point. Similarly, in the small chainring, the chain must bend significantly to reach the larger rear cogs. By sizing your chainring so that you spend more time in the middle of the cassette rather than the extremes, you maintain straighter chain alignment across more of your gear range. This straighter chainline reduces articulation friction at the chainring and cassette interfaces, and also reduces side-loading on the chain itself.
The friction reduction benefits extend beyond chainline. Larger chainrings reduce chain articulation simply by virtue of having larger teeth. When chain links bend around a 55-tooth ring, each link bends through a smaller angle than when bending around a 50-tooth ring. This reduced articulation per revolution means lower internal friction losses. CeramicSpeed, a company that specializes in high-end bearing systems, has tested drivetrain efficiency extensively and found that optimizing chainring and cassette combinations can save 2-5 watts compared to poorly configured setups. While some of these gains come from premium components, a significant portion comes from simply choosing appropriate gear ratios and chainring sizes for your riding style.
Cadence optimization represents another consideration when choosing chainring size. Larger chainrings require lower cadence to maintain a given speed in the same gear ratio, while smaller chainrings demand higher cadence. This relationship isn't about forcing yourself into a specific cadence, but rather about finding the natural pedaling rhythm that produces your best power. Many riders discover that they can spin slightly more comfortably on larger chainrings because the reduced chain resistance at each tooth makes for a smoother pedal stroke. Others prefer the lower cadence that big gears naturally provide. The key is understanding that gear ratios can be maintained across different chainring sizes—you can achieve the same effective gear with a 54T chainring and a certain rear cog that you'd get with a 50T chainring and a different rear cog. The difference lies in how the drivetrain feels and how efficiently it transfers power.
The aerodynamic benefits of larger chainrings are often overlooked but shouldn't be underestimated. A larger chainring presents a slightly different profile to the wind, and more importantly, it changes where the chain runs relative to the frame. When you're in the big ring, the chain sits further out from the bike's centerline, which can actually be aerodynamically beneficial when paired with modern frame designs that incorporate chainring fairings or optimized tubing shapes. Additionally, larger chainrings often allow you to stay in the big ring more frequently across a wider range of terrain, reducing the need to shift to the small ring and potentially improving your ability to maintain aerodynamic positioning through rolling terrain.
Understanding the cassette pairing strategy is crucial for maximizing these benefits. If you're moving to larger chainrings, you'll want to consider whether your current cassette still provides appropriate gearing range. For example, if you switch from a 50T chainring to a 54T chainring but keep an 11-28T cassette, you'll gain some high-end gearing for descents but might lose some low-end climbing gears unless you adjust your cassette range accordingly. Modern 12-speed cassettes with their close ratios help address this challenge, allowing you to maintain fine gear progression even with larger front chainrings. Many riders find that moving to larger chainrings paired with slightly wider-range cassettes (like an 11-34T or 11-36T) gives them the best of both worlds: improved efficiency in the gears they use most, with adequate gearing recovery for steep climbs.

Practical Gearing Calculations
Understanding gear ratio mathematics is essential for making informed decisions about your drivetrain. The fundamental gear ratio formula is simple: divide the number of teeth on your front chainring by the number of teeth on your rear cog. A 53T chainring paired with an 11T cog gives you a gear ratio of 4.82:1 (53 ÷ 11 = 4.82). This means your rear wheel makes 4.82 revolutions for each pedal stroke. Compare this to a 50T chainring with the same 11T cog: 50 ÷ 11 = 4.55:1. The larger chainring provides a bigger gear ratio, meaning you'll travel further per pedal stroke at the same cadence, or maintain the same speed at a slightly lower cadence.
For a more complete picture that accounts for wheel and tire size, gear inches provide a standardized measurement system that allows comparison across different bike setups. The gear inches formula multiplies the gear ratio by your wheel diameter (including tire): Gear Ratio × Wheel Diameter in inches = Gear Inches. For a standard road bike with 700c wheels and 25mm tires (approximately 27 inches total diameter), the calculation works like this:
Example 1: Traditional Setup
- Chainring: 50T
- Rear Cog: 11T
- Gear Ratio: 50 ÷ 11 = 4.55
- Gear Inches: 4.55 × 27 = 122.85 gear inches
Example 2: Big Ring Setup
- Chainring: 54T
- Rear Cog: 12T
- Gear Ratio: 54 ÷ 12 = 4.5
- Gear Inches: 4.5 × 27 = 121.5 gear inches
Notice that despite the larger chainring, the gear inches are nearly identical because we're using a larger rear cog. This demonstrates how you can achieve equivalent gearing with different chainring/cassette combinations. The difference lies in how the chainline and efficiency vary between these setups.
Let's work through another practical example with climbing gears:
Example 3: Low Gear Comparison
Traditional: 34T chainring × 28T cog = 1.21 ratio × 27 = 32.67 gear inches
Alternative: 39T chainring × 32T cog = 1.22 ratio × 27 = 32.94 gear inches
These nearly identical gear inches show how you can achieve similar low-end climbing gears while potentially using a larger chainring for improved efficiency in your cruising gears.
To audit your current gearing and identify optimization opportunities, start by noting your most-used gears during typical rides. Most intermediate riders spend 80% of their time in just 3-4 gear combinations. If you find yourself frequently in your big chainring and the smallest 2-3 cogs, consider whether a larger chainring would let you use the middle of the cassette more often. Conversely, if you're constantly in your small ring and the largest cogs, you might benefit from a larger small chainring or a different cassette range. The goal is to maximize the time your chain runs relatively straight through the drivetrain.
For common groupset combinations, here are some practical comparisons:
Shimano Ultegra 11-speed:
- Standard: 50/34T chainrings × 11-28T cassette
- Optimized: 52/36T chainrings × 11-32T cassette
Result: Better chainline in cruising gears, maintained climbing range
SRAM Rival 1x (gravel):
- Current: 42T chainring × 10-42T cassette
- Alternative: 46T chainring × 10-50T cassette
Result: Improved efficiency at gravel speeds, retained bailout gear
When considering which components to swap affordably versus requiring complete overhauls, chainrings offer the best bang-for-buck. Most modern cranks allow chainring replacement, and chainrings typically cost $50-150 depending on brand and materials. Moving from 50/34T to 52/36T or 54/40T chainrings is usually straightforward and requires no other changes. Crank arm replacement is more involved and expensive ($200-500 for quality cranksets), but the positioning benefits of shorter cranks might justify the cost if you're experiencing discomfort or can't achieve your desired aero position. Cassette changes are also relatively affordable and easy, with compatible options available for most drivetrains.
A simple method for determining your optimal chainring size involves tracking your typical riding speeds and terrain. If you frequently spin out your top gear on descents (cadence drops below 70 RPM when you want to go faster), a larger chainring would help. Conversely, if you rarely use your smallest cassette cog, you're running more chainring than you need. The sweet spot lies in having enough top-end gear for your fastest descents while maximizing your time in the middle of the cassette during normal riding. For most intermediate road cyclists, this means 52-54T big chainrings paired with cassettes that have 11T or 12T smallest cogs.
Implementation Guide
Implementing a "big ring, short crank" strategy doesn't require throwing money at every component simultaneously. A prioritized approach lets you test changes and evaluate benefits incrementally, making informed decisions about what works for your riding style and budget. For most intermediate cyclists, chainring upgrades offer the best initial return on investment, followed by crank length changes if position improvements are desired.
Your first priority should be optimizing your chainring size for your typical riding conditions. This change costs $50-150 and takes about 30 minutes to install. If you're currently running a compact 50/34T setup and do most of your riding on rolling terrain or flat roads with moderate climbs, consider moving to a 52/36T or 54/40T combination. This gives you a bigger ring for efficiency and slightly larger small ring for climbing versatility. If you're already running a standard 53/39T setup and find you rarely use the 53T, your current sizing might actually be appropriate—the key is matching chainring size to your actual riding patterns, not following arbitrary standards.
For budget-friendly approaches, chainring-only upgrades provide substantial benefits. Most modern Shimano, SRAM, and Campagnolo cranks use replaceable chainrings with standardized bolt patterns (usually 110mm BCD for compact cranks, 130mm BCD for standard). Check your crank specifications and compatibility before purchasing—some older or proprietary cranks have limited chainring options. Aftermarket options like Specialized's S-Works chainrings, Praxis Works, and Absolute Black offer excellent quality at reasonable prices. For riders wanting to emulate Pogačar's 55T setup, companies like Carbon-Ti and Rot BOX make oversized chainrings that fit standard crank bolt patterns, though you'll want to verify that your frame has adequate clearance.
Crank length changes require more consideration and investment. If you decide to try shorter cranks, you'll need to replace your entire crankset unless you're running a very specific modern crank that offers interchangeable arms. Budget $200-400 for a quality crankset installation including bottom bracket compatibility checks. Before committing, consider whether your current positioning limitations actually stem from crank length. A professional bike fit can help determine if hip closure, knee pain, or difficulty achieving your desired position would improve with shorter cranks. Many bike shops offer crank length testing with temporary adjustable cranks that let you experiment before purchasing.
Compatibility considerations are crucial when mixing components across manufacturers. Shimano, SRAM, and Campagnolo all have slightly different chainring tooth profiles and shifting ramps. While you can typically mix and match chainrings across brands with acceptable results, optimal shifting performance comes from staying within manufacturer systems. Additionally, chainring size changes may require chain length adjustment. As a general rule, adding two teeth to your chainring requires adding one link to your chain, though you should always verify sizing by wrapping the chain around your largest combination of gears before cutting.
The adjustment period for shorter cranks varies by rider but typically involves 2-3 weeks of adaptation. You may notice that your natural cadence slightly increases, which is normal. The reduced pedal circle diameter means your feet travel a shorter distance each revolution, and your body naturally finds a slightly faster rhythm to compensate. Some riders initially feel like they're "spinning" more, but this sensation usually resolves as muscle memory adapts. Focus on smooth pedaling technique rather than forcing a specific cadence, and consider temporarily reducing your training intensity during the first week of adaptation to let your neuromuscular system adjust.
For riders transitioning to larger chainrings, the adjustment period is usually shorter—just a few rides to get accustomed to the different gear progression and find your new preferred combinations. Pay attention to which gears you use most frequently and whether you're spending more time in the middle of the cassette rather than the extremes. The goal is improved efficiency and smoother shifting across your riding conditions. If you find yourself constantly in the largest or smallest cogs, you may need to further refine your chainring and cassette choices.
Are You In?
The "big ring, short crank" revolution isn't about blindly copying professional setups—it's about understanding the relationship between your physiology, your bike's mechanics, and the demands of your riding. By considering how crank length affects your hip angle and positioning, and how chainring size influences drivetrain efficiency and gear utilization, you can make informed decisions that improve your cycling experience without requiring a complete bike overhaul. The benefits compound: better positioning improves aerodynamics, more efficient drivetrain reduces energy loss, and appropriate gearing optimization helps you spend more time riding smoothly and confidently.
For intermediate cyclists, the practical takeaways are clear. Start by auditing your current gear usage to identify optimization opportunities. Consider moving to larger chainrings if you're frequently using the smallest cassette cogs or if improved efficiency in your cruising gears would benefit your typical rides. Experiment with shorter cranks if you experience hip closure issues, want to achieve a more aerodynamic position, or ride terrain where pedal strike clearance matters. Most importantly, make changes incrementally and give yourself time to adapt. Small, thoughtful adjustments that address your specific needs and riding style will yield better results than dramatic changes based on what works for professionals with different physiological profiles and racing demands.
The beauty of modern drivetrain components is their flexibility. With interchangeable chainrings, varied cassette options, and cranksets available in multiple lengths, you can fine-tune your setup to match your individual physiology and riding preferences. Whether you're targeting personal bests on fondos, improving comfort on long gran fondos, or simply want your bike to work more efficiently for the type of riding you actually do, the principles behind this trend offer a roadmap for optimization. Experiment within reasonable parameters, listen to your body's feedback, and enjoy the process of making your bike work better for you—that's where the real speed gains are found.
