Our wheels spin thousands of times during a single ride, their silent rotation made possible by a handful of precision-engineered bearings tucked inside your hubs. These unsung heroes of your bicycle support your entire weight, withstand lateral forces from cornering, and resist the elements while maintaining the smooth rotation that transforms pedalling effort into forward motion. Yet hub bearings are among the most neglected components on many bicycles, often ignored until they start grinding or clicking during rides. Understanding hub maintenance isn't just about extending component life; it's about preserving the free-spinning efficiency that makes cycling feel effortless. Whether you're running cup-and-cone hubs on your training bike or cartridge bearings on your carbon race wheels, proper bearing maintenance transforms a mediocre ride into something truly exceptional.
Understanding Your Hub System
The first step in hub maintenance is understanding what type of bearing system your wheels employ. Cup-and-cone hubs, the traditional design that Shimano has perfected over decades, feature adjustable bearing races that can be maintained and adjusted as components wear. These systems use loose ball bearings that sit between a stationary cup pressed into the hub shell and a threaded cone that adjusts for play. The beauty of cup-and-cone systems lies in their serviceability—when bearings wear, you replace the balls, clean the cups and cones, and adjust the tolerance. With proper care, a quality cup-and-cone hub can last decades.
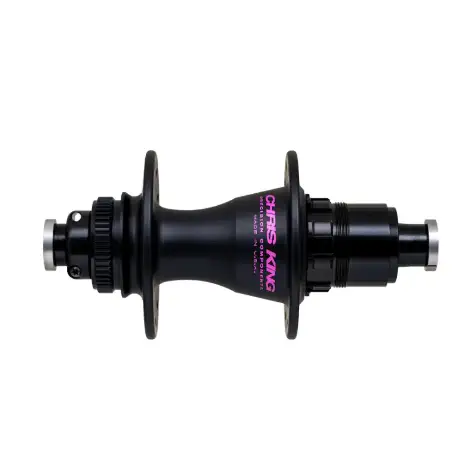
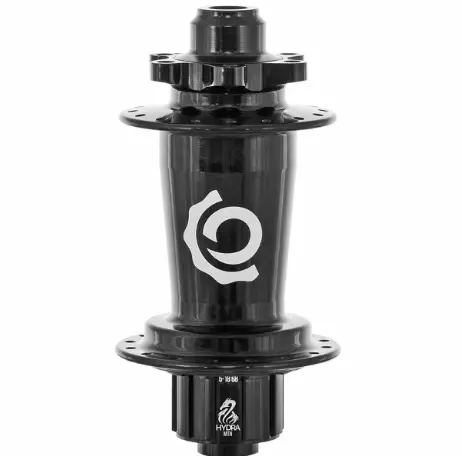
Cartridge bearing hubs take a different approach, using sealed bearing units that are pressed into the hub shell. These cartridges contain pre-assembled ball bearings and races in a sealed unit, typically with rubber or metal shields on both sides. When cartridge bearings wear, you don't service the individual bearings—you simply press out the old cartridge and press in a new one. This design offers convenience and consistency, though at the cost of long-term serviceability. Many modern wheel manufacturers, from Chris King to DT Swiss, use cartridge bearings for their ease of replacement and predictable performance.
The distinction matters because maintenance approaches differ significantly between systems. Cup-and-cone hubs require cleaning, greasing, bearing replacement, and precise adjustment. Cartridge bearings require less frequent attention but eventual complete replacement rather than servicing. Understanding which system you have ensures you're following the correct maintenance procedures and investing in the right tools and supplies.
Hub bearings face a constant assault from environmental contaminants, and understanding these threats helps you develop effective prevention strategies. Water is perhaps the most insidious enemy, whether it's from rain rides in the Victorian Alps or river crossings on Queensland singletrack. Water washes away lubricating grease and causes corrosion on bearing surfaces, leading to rough rotation and eventual failure. Many bearings that appear to have simply worn out have actually succumbed to water ingress over months of riding in wet conditions.
Dust and grit form a particularly destructive combination when mixed with lubricating grease. The fine silica dust found on Australian gravel roads acts like grinding paste when it infiltrates your hub bearings, gradually wearing away the polished surfaces. Coastal riders face the additional challenge of salt air, which accelerates corrosion even without direct saltwater exposure. A hub bearing that's been subjected to years of coastal riding will often show distinct corrosion patterns, particularly on steel cones and ball bearings that haven't been adequately protected.
Heat is another factor that affects bearing performance, though less dramatically than water or contamination. Extended braking descents can heat brake tracks and transfer that heat through hub shells, potentially breaking down lubricating grease. This is particularly relevant for rim-brake wheels in the Snowy Mountains or other areas with sustained descents. The heat-induced breakdown of grease reduces its effectiveness as a lubricant and protective barrier, accelerating wear on bearing surfaces.
Signs Your Bearings Need Attention
Identifying bearing issues early saves money and prevents catastrophic failures. The most obvious sign of bearing problems is rough rotation when spinning your wheels off the bike. A healthy wheel should spin freely for several revolutions, slowing gradually and smoothly. Wheels with worn bearings will feel gritty, notchy, or show signs of resistance that stops them quickly. You might hear clicking, grinding, or rattling sounds that change as you turn the wheel, particularly audible in quiet environments or when your wheel is spinning freely.
Play or wobble in the wheel assembly indicates bearing adjustment issues or excessive wear. With the wheel mounted in the frame or fork, grasp the rim at the brake caliper and rock it side to side. Any perceptible movement suggests bearing play that needs addressing. The same test can be performed on the wheel in a workstand or by hand, though the tolerances change when quick-release skewers or thru-axles apply clamping force.
Audible clues during rides often indicate bearing problems before you can feel them. A persistent clicking that correlates with wheel revolution speed, especially under load when pedalling hard out of corners, often points to bearing issues. This shouldn't be confused with freehub ratchet sounds, which are normal. Bearing-related sounds typically have a different quality—more metallic or grinding than the crisp engagement of a freehub mechanism.
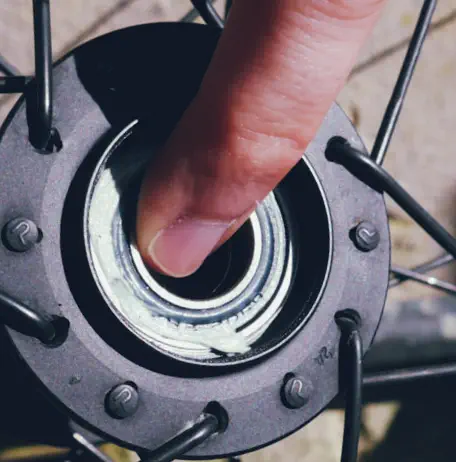
Visual inspection can reveal bearing issues if you know what to look for. Removing wheels and examining hub shells for oil or grease leaks often indicates bearing seal failure. Check the space between hub shell and axle for fresh grease or oil deposits, particularly after rides in wet conditions. Bent axles, detectable by rolling the axle on a flat surface and watching for wobble, are also clear indicators that service is overdue.
Maintenance Intervals: How Often Is Enough?
The million-dollar question—how often should hub bearings be serviced—has frustratingly variable answers depending on riding conditions and hub types. Kogel Bearings, a respected manufacturer of high-performance bearings, officially recommends annual service intervals. This generic guideline makes sense for many riders but doesn't account for the extreme diversity of Australian riding conditions.
Riders who regularly tackle wet conditions, whether rain rides in Tasmania or muddy trail riding in the Otway Ranges, will need more frequent service. Mountain bikers who regularly cross creeks or ride in mud should inspect their bearings after particularly wet rides and perform full service at least twice annually. Conversely, fair-weather road riders who avoid rain and store bikes indoors can often stretch service intervals to 18 months or even two years without significant bearing degradation.
Mileage provides another useful guideline, though one that varies based on conditions and rider weight. For rough mountain biking or gravel riding, consider bearing service every 2,000 to 3,000 kilometres. Road riding in good conditions might allow 5,000 to 8,000 kilometres between services. Heavy riders or those who frequently load panniers for touring should reduce these intervals, as the additional stress accelerates bearing wear.
The key principle is developing a maintenance rhythm based on your personal riding patterns rather than following rigid schedules. Pay attention to how your wheels feel after different types of rides. Notice when free-spinning starts to degrade or when wheel removal reveals contaminant buildup. These subtle changes over months of riding provide valuable data for establishing your ideal maintenance cadence.
Cup and Cone Hub Service: A Step-by-Step Guide
servicing cup-and-cone hubs is a satisfying mechanical process that returns your wheels to their original performance. Begin by removing your wheels from the bike and, for rear hubs, removing the cassette to access the drive side. You'll need cone wrenches—thin-profile wrenches that fit the narrow adjustment flats on the cone. Always use the smallest size that properly fits to avoid slipping and damaging components.
Before disassembly, measure the axle protrusion on both sides. Count the threads past the locknut face or measure with a ruler. This measurement ensures you can return the axle to the correct position during reassembly, maintaining proper wheel spacing. Starting from the non-drive side on rear hubs (the side without the cassette), hold the cone with a cone wrench while loosening the locknut with a standard wrench. Remove the locknut, any washers or spacers, then remove the cone, keeping all parts organised and in order.
Carefully lift the hub shell from the axle, being prepared to catch the loose ball bearings. Most cup-and-cone systems use 1/4-inch balls on rear hubs (typically 9 per side) and 3/16-inch balls on front hubs (typically 10 per side). Use a magnet to extract bearings from both cups, then count them to ensure you have them all. Missing bearings indicate the lost ball has potentially damaged bearing surfaces during operation.
Cleaning is the foundation of good service. Use a quality solvent to clean all components thoroughly—hubs, cones, balls, and axle. Inspect each part carefully. The cup surfaces pressed into the hub shell should be smooth and polished. Any pitting, scoring, or roughness indicates damage that typically requires hub replacement, as pressed cups cannot be easily replaced. Cone surfaces should likewise be smooth; damaged cones are generally available as replacement parts and much cheaper than new hubs.
Ball bearings should be bright and shiny. Dull or discoloured balls are worn and should be replaced—they're inexpensive, and fresh balls transform bearing performance. Roll the axle on a flat surface to check for straightness; bent axles must be replaced. While bent axles can sometimes be straightened, the process weakens the metal and risks subsequent failure.
Assembly begins with generous application of quality waterproof grease to the bearing surfaces and cups. Park Tool's Polylube 1000 is a reliable choice, as are many marine greases designed for wet environments. Place fresh bearings in both cups, seating them in the grease. The grease serves dual purposes: lubricating the bearings and holding them in place during assembly. Reinstall the axle components in the exact order and orientation they were removed, matching the original axle protrusion measurement you took earlier.
Bearing Adjustment: The Fine Art of Cone Tuning
Proper bearing adjustment is where cup-and-cone systems separate from cartridge hubs in terms of performance potential. The goal is the loosest adjustment that has no play—bearings that spin freely without knocking or wobbling. This adjustment is particularly critical for quick-release hubs because the hollow axle flexes slightly when the skewer is clamped tight. The adjustment must account for this flex, meaning there should be slight play when the wheel is out of the bike that disappears when it's properly clamped in the frame.
Start by adjusting the cone snug against the bearings, then back off about one quarter turn. Hold this position while tightening the locknut. Check for play by rocking the axle side to side. If play is present, tighten the cone in small increments—think 1/32 of a turn, roughly the angle between spokes on a 32-hole wheel. Each adjustment requires loosening the locknut, moving the cone, then re-tightening the locknut before checking again. This process typically requires several iterations before finding the perfect adjustment.
Install the wheel in your frame or fork and clamp it properly using your quick-release or thru-axle. Check for play by rocking the rim at the brake caliper. If there's no play when clamped but slight play when unclamped, you've nailed the adjustment. If there's still play when clamped, remove the wheel and repeat the tightening process. If there's no play in either state, your adjustment is too tight—back the cone off slightly and try again.
Solid axle wheels (common on track bikes and some mountain bikes) have different requirements. Since solid axles don't flex like hollow quick-release axles, the adjustment when unclamped should match the clamped adjustment. Adjust for the loosest setting without any play, testing with the wheel mounted in the bike to confirm.
Cartridge Bearing Replacement: When Service Means Swap
Cartridge bearing maintenance is simpler but less satisfying than cup-and-cone service. Rather than cleaning and adjusting worn components, you're essentially replacing the entire bearing assembly. The process begins with identifying the cartridge size, typically stamped on the bearing outer race. Common sizes include 6802, 6902, and 6903 for many road wheel hubs.
Removing cartridge bearings requires careful technique. Some press out easily with appropriate drift tools, while others are stubbornly pressed into place. Never pry against bearing surfaces with screwdrivers or similar tools—you'll damage the hub shell. Use proper bearing drifts or sockets that bear against the outer race. Heat can help stubborn bearings—applying gentle, even heat with a heat gun on the hub shell can expand the metal enough to release the bearing.
Before pressing in the new bearing, clean the hub shell bore thoroughly and inspect for damage. Lightly grease the bore to ease installation and protect against corrosion. Press the new bearing evenly using a bearing press or appropriate drifts, ensuring it seats fully and squarely. Never use a hammer directly on the bearing—always use a drift to distribute force evenly across the outer race.
Freehub bearings often go unnoticed until they cause problems. These smaller cartridges sit inside the freehub body and endure significant torque during hard efforts. Symptoms of failing freehub bearings include a gritty feel when spinning the cassette, clicking under load during pedalling, or difficulty coasting smoothly. Many freehub units are designed for easy bearing replacement, though some are not serviceable and require freehub replacement when bearings fail.
Professional Service: When to Call the Experts
Pedal Passion's hub service, starting from just $39, offers comprehensive bearing cleaning and regreasing along with cup and cone adjustment. For riders who don't own cone wrenches, bearing presses, or other specialised tools, professional service represents excellent value. The service includes detailed cleaning, proper bearing lubrication with quality grease, and precise adjustment that transforms wheel performance.
For electronic groupset owners or those with high-end wheel systems, professional service becomes particularly valuable. Complex modern wheels from manufacturers like Zipp, ENVE, and Hunt have proprietary designs that benefit from experienced mechanics who understand the specific requirements. These wheels often have integrated dust caps, specific bearing preload systems, or other design features that require specialised knowledge and tools.
Consider professional service if you're uncertain about bearing adjustment or if you've attempted adjustment without success. An improperly adjusted cup-and-cone hub can damage itself quickly if too tight or allow contamination ingress if too loose. Experienced mechanics have the feel and experience to dial in perfect adjustment, often catching subtle issues during the process that less experienced hands might miss.
Prevention: Extending Bearing Life Between Services
The best bearing service is the one you don't need to perform because you've prevented the problems that necessitate it. Regular cleaning goes a long way toward extending bearing life. After wet or particularly dirty rides, wipe down your wheels with a damp cloth, paying particular attention to the hub shells and the area between hub and spokes. This removes surface contaminants that might eventually find their way past seals.
Avoid high-pressure water directly on hubs. Many riders love the convenience of pressure washers after muddy rides, but forceful water spray can overwhelm bearing seals and drive contaminants past protection. A gentle garden hose or bucket of water cleans effectively without the risk of seal damage. If you must use a pressure washer, keep the nozzle at a distance and avoid directing it at hubs or bottom brackets.
Inspect your wheels regularly, particularly after crashes or significant impacts. A hard pothole hit or the occasional mountain bike crash can damage axle bearings even if the wheel stays true. Annual inspection of all bearing systems—hubs, bottom bracket, and headset—catches developing issues before they become ride-ending problems.
Proper wheel installation protects bearings from excessive wear. Ensure quick-releases are properly tensioned and thru-axles are tightened to manufacturer specifications. An under-clamped wheel allows lateral movement that damages bearing surfaces, while an over-tightened quick-release can crush bearings, particularly on hollow axles. Find the sweet spot of secure clamping without excessive force.